Monday, 10 December 2012

Pixie hat with scarf

Does it happen to you that your kids go to school with scarf and loose it somewhere on the way? Or have a scarf but don't tie it, so it does not serve its purpose?

While browsing net I found cute pixie hat to crochet. Well, my time is due to studies precious, I needed quicker fix. So I made it from nice and warm fleece material. It is very very easy.

  1. You will need 2 rectangles. Customize them accordingly. One for the hood and one for the scarf.
  2. First shorter rectangle will be your hood. Simply sew them on one of the longer sides. 
  3. The longer one will be your scarf that you will sew to the hood. 
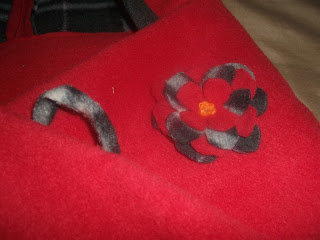
  4. Add stylish button, or make one from fleece or dry zipper, whatever you prefer. 
  5. Enjoy. 


Thursday, 30 August 2012

Homework station


There is not need to buy some expensive organizers. You just need some used box, double side tape, scissors and decorative paper.
I raised one side of the box as my support. Simply using the cut lid and tape.

Compartments are necessary, each kids has its own

Folders are going to be added. Each one will have its own color.


And here is the final results with some extra touches.


Goodbye shoelaces

My youngest is going to start preschool, but unfortunately we did not learn yet how to tie shoelaces. Some of her shoes are with dry zipper, so no worries there, but we have others that she will have at school. And yes, they have shoelaces. So here is a simply trick I have used to replace shoelaces with elastic.


Monday, 27 August 2012

Organizing cabels and wires

Almost every gadget we buy comes with its own cable. With a time we are just overloaded with them. So if you are fed up with looking for the right cable for you MP3 or camera or anything else, you will enjoy this tip, which is not only very cheap, but also very effective. I did not feel like to give the extra effort, but you can decorate the toilet paper rolls by painting them or sticking something on them etc.

What do you need:

Box (plastic, shoebox...)
Toilet paper rolls
Cables

How:

Simply just fold your cables into the rolls. :-)


Wednesday, 22 August 2012

Home made cones for cream rolls

If you would like to make cream rolls but don't have the right tools, don't worry, you can make your own.

Originally, cream rolls are rolled onto this type of tiny iron pipes...


However, you can make very pretty cones. They can be used not only for these rolls, but also for other pastry of even a bread dough.

We will need:
  •  Cereal box or any other sturdy paper
  • Scissors
  • Aluminum foil
  • Stapler
Cut out large circle from the sturdy paper. You can use plate as your template. Cut out the circle and divide it to quarters. Staple the sides (I found it easiest). Cut large piece of foil, wrap it around the cone and you are good to go. Btw. before you use them, it is always good to brush them with butter, so the pastry goes easily off.


Kremrole :: Sweet rolls

This eid I have tried something new and I'm glad I did. Well it is not new to me as to the taste, rather it is something I have only eaten, but never made. To my surprise these sweet rolls are very easy to make and of course they are just as delicious. You could do it with puff pastry if you are able to buy one, or you can just try this easy recipe.


Ingredients:
For shells:
  • 420g of flour
  • 420g of butter
  • 4 egg yolks
  • 2 tbs of sugar
  • 9 tbs of water
  • pinch of salt
For cream:
  • 4 egg whites
  • 280g sugar
  • water

Mix well all the ingredients for the shells (according to your flour, the dough can feel sticky, so add a bit of flour according to your needs) and set aside in the fridge for 30 minutes.

Roll the dough (about 1,5 cm thickness), cut stripes and roll them onto iron pipes or home made ones. Brush with egg.


Bake at 405F for about 15 - 20 minutes, depending on the size. Let it cool and then fill with your cream.


How to make cream:

Beat egg yolks until soft peak, add 100g of sugar and beat till stiff peak. Meanwhile.... In a small pan boil the rest of the sugar with water. Add as much water as you need just about to cover the sugar. Let it boil gently for about 30 minutes. To test, if it is done, make a small eye with thin iron wire (or use some utensils with eye), dip it in the mixture and blow. If you are able to blow bubble, it is done. Pour slowly this sugar mixture to the peaks and continue till well blended.

Fill the shells with the cream and serve. You can store them in a cool place in air tight container.


Butterflies

This is very nice and very easy craft project that you can do with children any time.

Supplies:

Coloured tissue paper
Feather
Glue
Scissors
Marker
String


Instructions:

Cut out from tissue paper a butterfly shape. Draw some designs on it. Glue feather in the middle. Attach string and hang. Very very easy and pretty too. 


Tuesday, 15 May 2012

Hot dog buns recipe

Well, kids wanted hot dogs, but buns nowhere to be found. Trip to the store didn't seem like a good idea. So in the end I have made these hot dog buns that are so delicious that I'm so not going to buy them anymore. The unfilled rolls can be stored in the freezer or simple eaten as a sandwich.


Ingredients:

1 cup of milk
1 cup of warm water
1/4 cup of vegetable shortening/butter
5 cups of flour
1 tbs yeast
1 tbs sugar
1 1/2 tsp salt
1 egg
 

Divide the flour onto two parts - to one add salt, to the other east. First mix up with other ingredients the yeast one and then add the salt one. The dough will be quite heavy, but will soften after rising. Let dough rise 30-35 minutes. After that make rectangles and roll them tightly. Let rise again for about 30 minutes more or till double the size.

Bake at 400F 10-12 minutes. Fill and enjoy.

Thursday, 3 May 2012

Upcycling baby tank bodysuit: step-by-step

I found a really cute baby tank bodysuit. My daughter loved it very much, so this is how I turned t-shirt for 18 months to tank top for 9 year old.


Maximising oven space

One of my main issues while baking cookies, pizzas or anything with "s" is space. I can fit comfortably one pizza tray, or cookie tray, however when I bake more and have more trays, I have to bake each separately. I don't like using top or bottom of the oven. Don't ask me why, I simply prefer the middle.

So I thought of a way how to maximise oven space by placing my second tray on a "higher ground". It works well and cuts my cooking time half as I can place both trays at the same time and they are baked evenly.

"Higher ground" is basically muffin tin, but I guess you could use any other tin. 


Wednesday, 11 April 2012

Berry Smoothie

Healthy and nutritious start is the best you can give to yourself, so why not to treat yourself to great morning/snack smoothie?

Ingredients:

Something for fibre - oats
Something for proteins - plain white yogourt
Something for calcium and other vitamins and minerals - soya milk
Something for antioxidants, vitamin C, magnesium and other minerals - berries
Something for sweetness - sugar

I have made about 1 1/2 litre mixing 2 tablespoons of yogourt, 2 tablespoons of oats, 4 tablespoons of sugar, 2 1/2 cups of berries and soya milk till reaching desired consistency. Result - just perfect.


Thursday, 8 March 2012

How to defrost fish

There are many ways how to defrost fish. E.g. leaving it in its original packaging in the fridge, leaving it under running cold water for a while, leaving it in a fridge on a plate regularly removing excess water, microwaving them... Well, I have tried them all.

In the end, I have settled for a very simple and efficient way without any worries about fish swimming in a defrosting water, or actually cooking them in microwave instead of defrosting them.

So I take my pack of frozen fish and drop them into a strainer. Yes, plain old strainer you would use for your spaghetti or pasta.


If I'm going to leave fish over night to thaw, I place strainer into a casserole slightly larger so the bottom of strainer is not sitting all the way down. Cover with lid and place it on the bottom shelf of a fridge. This way all the defrosting water goes down to the casserole and does not stay on a fish.

Thursday, 1 March 2012

Flat bread

Flat bread  (16 pieces):


3 and 2/3 cups of flour (you can mix up white with whole wheat)
2 tsp of baking powder
1 tsp of salt
2 tbs of oil
1 cup of water (you can add a bit more if needed)

Knead all ingredients together. Place into a lightly oiled bowl and let sit for an hour. Divide to 16 smaller balls, or 8 bigger and roll to oval-shape. Place on grill or frying pan with little or no oil. Bake till brown and serve.

Bean soup

Easy bean soup with flat bread


Ingredients for bean soup (recipe for 8 people):


2 cans of beans (any kind)
1 liter of water
2 cubes of chicken stock
1 potato
handful of fresh parsley
bit of marjoram
2 spoons of tomato paste

Boil everything together. Once potatoes are soft, blend everything together using hand mixer if possible. Hand mixer is very easy and useful tool, especially if your kids don't like so much veggies. Serve with flat or any other bread.


Recipe for flat bread: here


Saturday, 25 February 2012

Burns - fast and effective relief

How many times have you burn yourself? I'm burning myself quite often. God willing, it will be always my personal reminder, if I'm not able to stand such a small burn, how I will be able to manage in the Fire of Hell. May, He All Mighty, protect me and guide me toward His pleasure.

Here is remedy I have been using since my teenagehood. I have tried it and tested many times on small and guite nasty burns. It is something that we have most of the time in our fridge. It absorbs the heat and you can reapply it as much as needed. So what is this secret ingredient?

Mustard!
picture taken from menshealth.com

Yes, mustard. Just apply it generously on your burnt part, even second degree burns. It will lessen the outcome of the burn. Tried, tested and recommended.


Monday, 13 February 2012

Underscarves - how to - easy does it

Many hijabis wear a underscarf under their khimar. Their price depends on the quality and size. Well, here is a tip on how to save some money and upcycle as well.

I got one T-shirt that I know I would not wear even in a dream. But the material was very nice and my daughters use lot of amira-style hijabs and also with that lot of underscarves. So why not turning it into one?

It is very easy way of creating underscarves, because half of the job is already done with finished edges. Just measure the size you need, trace a rectangle on the T-shirt, cut out and sew.

Since my first underscarf from T-shirt, I have made couple of them, and I do have to say, all the women in the house are pleased with them. So if you have some T-shirt, undershirt, tank top etc. that you know you will definitely not wear, so at least you know, you don't have to give it or through it away. Happy sewing and stay blessed. :-)


Tuesday, 31 January 2012

3 Meatloaf tips

Perhaps everyone has made a meatloaf - minced meat shaped to a loaf and baked. Here are some of my tips from a meatloaf:

Increasing the amount
1. Take an older bread and soak it in water. Strain water well and add wet bread into your minced meat, blend with meat, egg, salt, herbs and spices well. It will soften the meaty taste and multiply your portions. You can substitute bread with breadcrumbs, but you will of course not soak these. Or to make a healthier choice, add some oats.

 To taste
2. Ketchup and mustard add a nice taste to the loaf. Also fresh herbs like coriander or thyme give kinda fresh taste to it.

Servings
3. If you want to make kids size portions, bake your minced meat in a muffin pan instead in the loaf pan. You can decorate each meat muffin with an olive in the center before baking and add a bit of cheese.


Easy cake with fruit

Here is a recipe for very easy and yummy cake that even your kids can make. You can use any kind of fruit you have - fresh or canned.


Ingredients:

3 eggs
1 cup of sugar
1 tsp of vanilla
2 cups of flour
1/2 cup of milk
1/2 cup of oil
2 1/2  teaspoons of baking powder
pinch of salt
fruit

Preheat oven to 350F (180C). Butter and dust with flour deeper baking pan.

Add eggs, vanilla and sugar into a bowl and whisk till light mixture. Add oil and whisk a bit more. Add remaining ingredients and blend well. Pour into a deeper baking pan and top with fruit. Bake for about 20 minutes, depending on the depth of your baking pan. So make sure by pricking cake with toothpick. If toothpick will come out clean, cake is done.


Thursday, 5 January 2012

Pain in the ear :: earache

Here is my homemade, easy and natural remedy to cure pain in the ears. I have tried it on myself, my children and recommend it to a friend, who also successfully tried on on her child. It is safe, effective, low lost and natural.

Ingredients:

Garlic head
Olive oil (small amount)

Pour olive oil into a bowl (cup, vessel...). Crush or press the garlic and add it to the olive oil. Let it sit in a warm place for about an hour. After that strain the garlic and use the olive oil only.

Put a 2 - 3 drops to the infected ear couple of times a day. For a night, soak part of cotton in the olive oil and insert it in the painful ear.